How to Dropship on Squarespace
Our independent research projects and impartial reviews are funded in part by affiliate commissions, at no extra cost to our readers. Learn more
If you’re eager to start your own ecommerce business, but you don’t have the space or the time to store and make your own products, we’ve got the answer for you. Dropshipping is the rising star of the ecommerce world, and practically anyone – yes, anyone – can get a piece of this pie!
There are plenty of website builders you can use to build your dropshipping store, but in this article, we’re going to focus on one of the best: Squarespace. Known for its breathtakingly beautiful templates and best-in-class website editor, we think it’s the perfect builder for showing your dropshipping products off. And our research agrees – it came out on top for its design features and its ease of use!
We’ve built our fair share of websites, so we’re ready to take you through every step of the process – from setting up your Squarespace website, to choosing your dropshipping app, to selecting your products. All you need to do is sit down, buckle up, and get ready to make your dropshipping dreams a reality!
What is Dropshipping?
We understand if you’re not quite sure on the ins and outs of dropshipping – it’s very different to the traditional model of ecommerce that we’re all used to. So before we get started on the hows, let’s take a minute to look at the whats – as in, what exactly is dropshipping?
Unlike the normal ecommerce route, dropshipping doesn’t require you to provide or store your own products. Instead, you play the role of the middle man, selecting items from third-party dropshipping suppliers and showcasing them on your site.
To top it off, you don’t need to worry about packaging and shipping your orders, either. The supplier will take care of that for you, too!
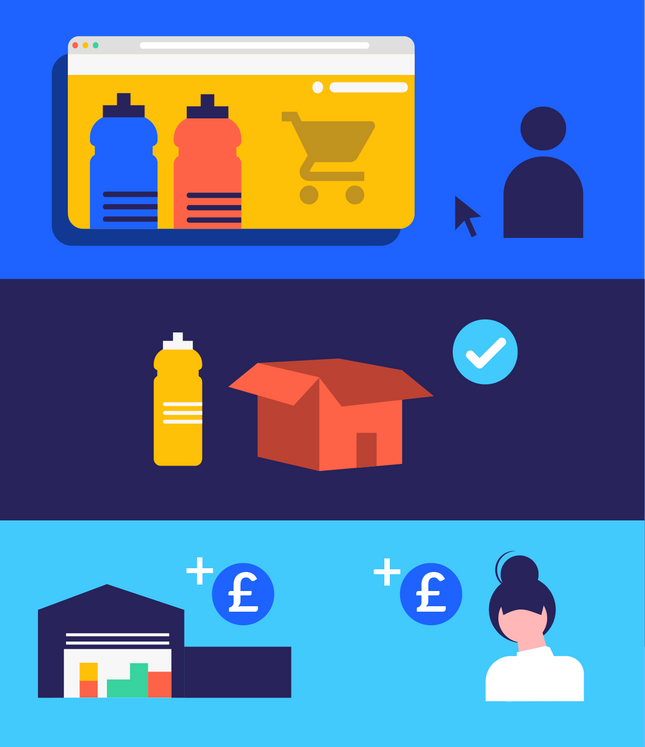
Don’t worry, we hear you. You’re wondering how you can possibly make any money this way, if you’re just selling other people’s products. It’s a valid question, and it’s important that you have a good grasp on what you get out of the arrangement, so let us explain.
When you select your products from the supplier, they’ll give you a wholesale price. You’ll then sell these items for slightly more – we call this the retail price. The difference between the two costs is your profit, and you get to keep that.
For example, imagine that you want to sell sports bottles. The sports bottle you’d like to sell has a wholesale price of $3. On your dropshipping website, you sell it for a retail price of $13. When a customer orders one of your bottles, the money will be divided, with $3 going to the supplier, and the remaining $10 going straight into your pocket. Simple!
Your overall profit is dependent on the types of products you sell, and certain items have a higher profit margin than others. If you choose wisely, though, dropshipping can be an incredibly lucrative and convenient ecommerce business model!
Dropshipping Pros and Cons
| Pros | Cons |
|---|---|
| Potential for High Profits With Minimal Overhead Costs The initial investment is low, so you can get up and running without forking out a ton of cash. | Customer Satisfaction Is Out of Your Control You’re not the one making the products, so it’s trickier to guarantee high-quality items and happy customers. |
| No Storage Necessary Your suppliers will store all of your products for you, so you don’t need to worry about warehouse space. | No Control Over Shipping Similarly, shipping is out of your hands. However, if your customers don’t receive their products on time, you’re the one that will receive the complaints. |
| No Packing and Shipping Involved Packing and shipping your orders will be up to the supplier, so you can focus on selling rather than sending. | You Must Provide Customer Support You’re solely responsible for offering customer support. Customer support software can also be expensive, which is another cost to factor in as your business grows. |
| Plenty of Room for Growth A dropshipping business is easy to scale, because you don’t need to worry about labor or storage costs. | Hard to Stand Out Dropshipping is a great gig, which is why so many people are doing it. But this makes it all the more difficult to build a brand that stands out from the crowd, especially if other stores are selling the same products. |
| Flexible Selling Options You don’t need to hang your hat on one product forever – dropshipping gives you the flexibility to experiment with a few different niches. | |
| Work from Anywhere Your home office, a coffee shop, even the beach! All you need to start dropshipping is a laptop and an internet connection. |
#1. Pick Your Niche
- Why you need a niche
- How to pick your niche
You might not need to make your own products to become a dropshipper, but that doesn’t mean you’re free to open a Pandora’s Box of this, that, and everything in between. Well, you could… but we’re not sure how successful it would be!
That’s because stores with a particular niche target a certain area of the market, making them a one-stop-shop for anyone interested in buying that type of product. Speaking from experience, we can also tell you that it makes branding and marketing much easier, too!
Although some people already have a good idea of what they’d like to sell, finding your niche can be a tricky process. To help you out, we’ve gathered together a list of questions to consider when trying to find yours:
- What are you passionate about?
A good place to start is thinking about your hobbies. Are you a yoga enthusiast? Do you dabble in arts and crafts? Explore the products associated with the things you like to do, and go from there.
- What are your competitors doing?
Once you’ve identified a few potential ideas, it’s worth scoping out the opposition. There are guaranteed to be others selling similar things, so it’s a good idea to see how they’re doing it – especially if they’re making it work well.
- Is there a demand for these products?
Use keyword research to check that people are searching for the items you want to sell. There are plenty of free tools to help you do this – we recommend using Google Adwords: Keyword Planner.
- Do you have a unique selling point (USP)?
What sets you apart from the crowd? No idea is truly unique, but it helps if you’ve got an angle that puts your business ahead of the competition.
- Is your idea truly viable?
Is it profitable? Will it go out of fashion in the next couple of months? Do you have a target audience in mind? These are all crucial to making sure your store doesn’t fall flat on its face before you get started.
Once you’ve got a few ideas for your niche, why not test them out on your friends and family? Feedback is important at every stage of your ecommerce journey, but especially at the beginning, when you’re trying to build a strong foundation. Your nearest and dearest might be able to spot opportunities that you’ve missed!
Further reading:
If you need a bit more help in this area, check out our guide on How to Find Your Niche Online. We’ll take you through the process in seven easy steps.
#2. Plan Your Budget
- Costs to consider before starting a dropshipping business
You might have been taught that talking about money is tacky, but when you’re starting a business, it’s something you can’t afford to ignore. Even though dropshipping requires minimal investment, it’s still a good idea to plan out your funds before you get started.
Your Squarespace Subscription
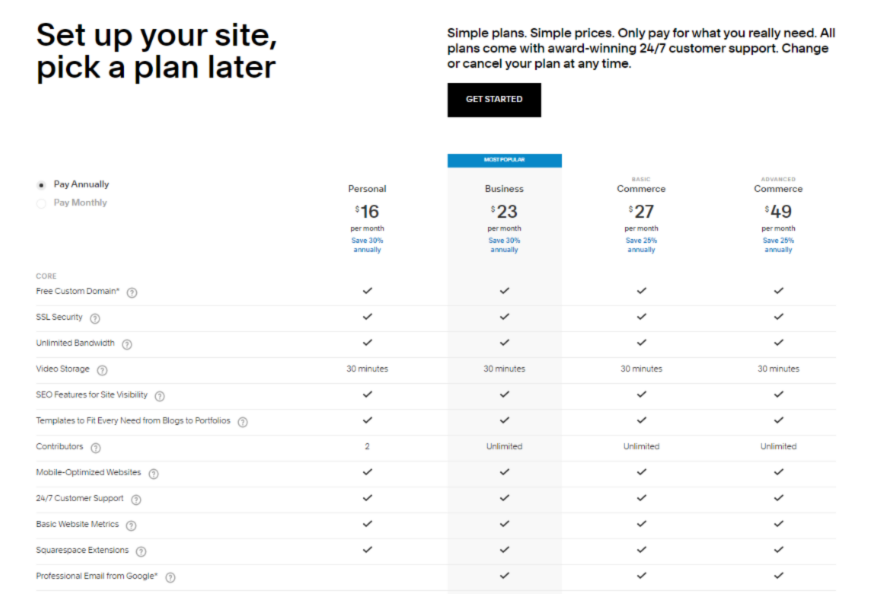
Squarespace doesn’t offer a free plan, so you’ll need to set aside some of your budget to pay for your subscription. This can be paid annually or monthly. Ecommerce plans start from $23 per month, but if you want full ecommerce functionality, you’ll need to opt for one of Squarespace’s more advanced plans.
Dropshipping App Subscription
The monthly cost of your dropshipping app will depend on which platform you choose to use. Printful, for example, won’t cost you a cent until your orders come through. At that point, you’ll need to cover the manufacturing costs (these are included in the wholesale price), and the shipping. Getting started, however, is completely free.
This isn’t the case with every app out there. For example, Spocket, a dropshipping app that offers a wider breadth of products to sell, doesn’t offer a free monthly plan – and the cheapest tier will set you back $24 per month.
Although these costs aren’t astronomical, it’s important that you still factor them into your planning process. Failing to budget properly could cause you problems further down the line, and make your sparkling profit margins suddenly less impressive.
#3. Create Your Squarespace Website
- How to set up a Squarespace account
- Choosing your template
- How to customize your store
You can’t start a dropshipping store without first creating a website, so before you get swept up in daydreams of your future ecommerce empire, let’s take a look at how you can use Squarespace to build your perfect online storefront.
Choosing a Template
To get started, head to the Squarespace homepage, and click the white ‘Get Started’ button in the top right corner. This will take you straight to a template selection page.
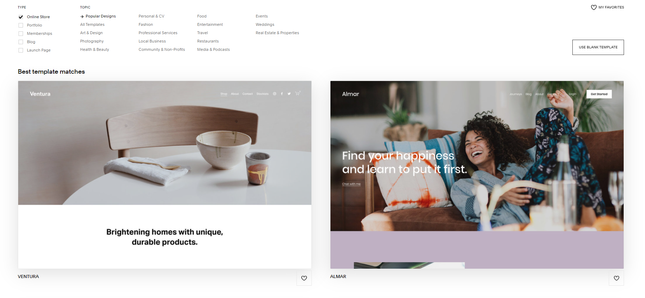
In case you didn’t know, Squarespace is the reigning champion of spectacular template designs, so when we say you’ll be spoilt for choice, we really mean it. In our research, it came joint first (alongside BigCommerce) for design functionalities, scoring an impressive 4 out of 5 stars.
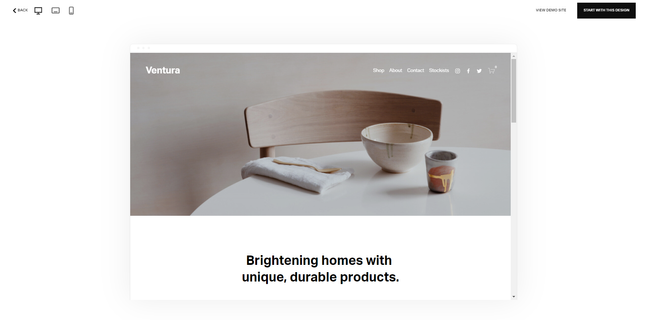
Want to take a closer look at the templates on offer? Use the preview option for a more hands-on view. If you hover over the template, two buttons will appear: ‘Start with [template name],’ and ‘Preview [template name].’ Select the second option.
This allows you to navigate the site as though you were a visitor, and gives you the option to view it on different devices. Over half of internet traffic comes from mobile these days, so a store optimized for multiple formats is a must.
We’d recommend taking your time when browsing the templates on offer, but if you want to make it easier for yourself, use the filter button at the top of the page. This lets you search by industry, so you can get rid of any templates that don’t fit into the ‘online store’ category. And don’t worry if your chosen template doesn’t have everything you might want – you can add extra pages and features with Squarespace’s editor later on.
Customizing Your Template
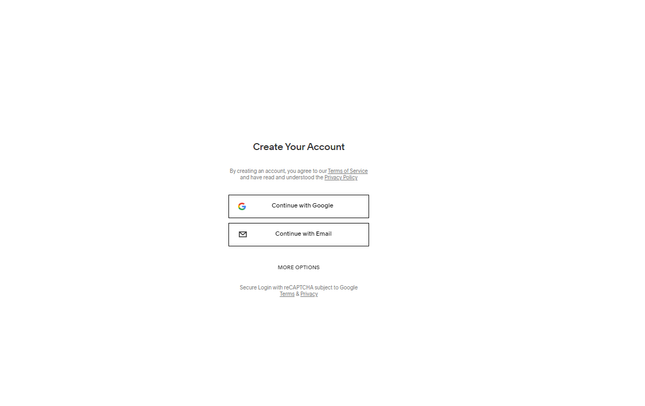
Once you’ve found a template you like, it’s time to start customizing it to suit your brand. Before you can get into the creative stuff, though, you’ll be asked to register your account. You’ll need to enter your name and email address and create a password before you can enter Squarespace’s editor.

When you get there, the first thing you’ll see is a pop-up box that asks you to enter the name of your website. You’ll then be given a short tour of the editor, so you’ll know where the main elements are found.
Now, at first glance, we can understand if you find the Squarespace editor slightly intimidating – we know we did! But, actually, Squarespace is one of the easiest builders to use, and scored 4.2 out of 5 stars in our ease of use testing. That’s the highest score out of the bunch!
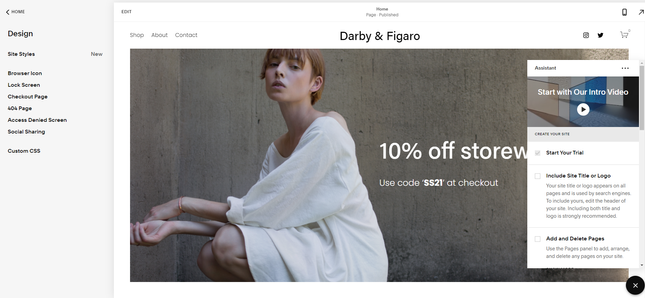
The left-hand menu controls all of the major elements of the site, like your color scheme and your pages. Clicking on any of the options in this sidebar will open a sub-menu, where you can drill down into the finer points of your website design.
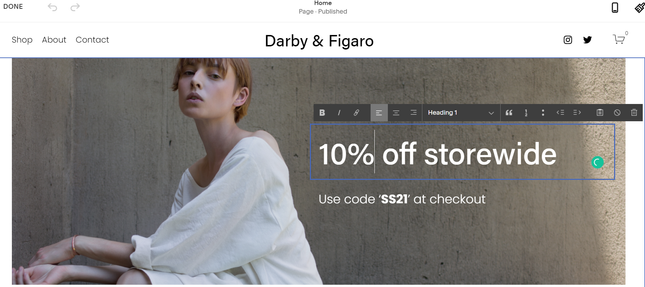
However, if you want to edit the actual content (text, images, and such), you’ll need to click on the ‘Edit’ button in the top left corner of your template. This will cause the side menu to disappear, and you’ll be able to interact with all of the individual elements on your pages.
Viewing Ecommerce Features
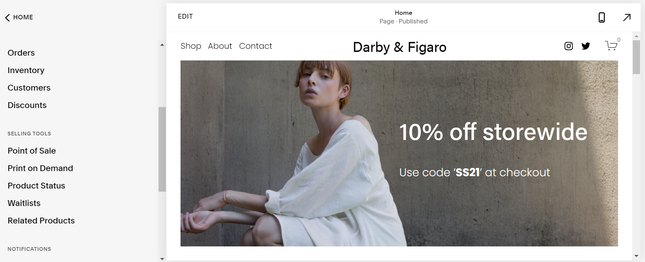
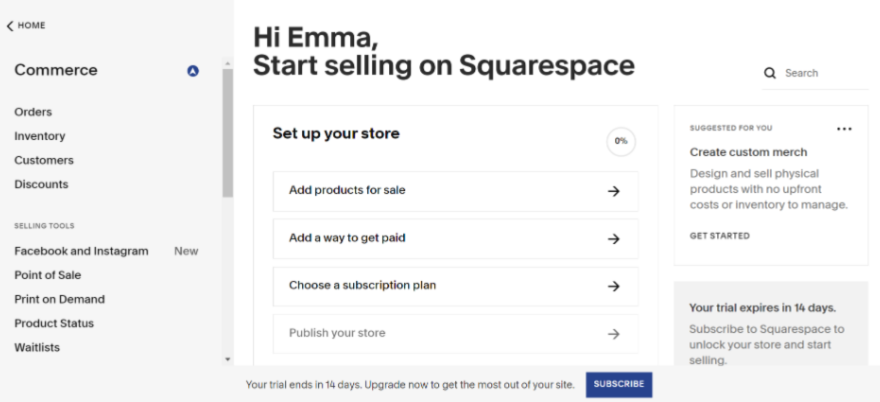
Ecommerce features have their own separate section in the Squarespace editor, under the ‘Commerce’ option in the sidebar. If you select this, you’ll be able to access your orders, inventory, and more.
When you first click on this heading, Squarespace offers the option to follow a setup tutorial. This will provide you with a series of steps designed to get your store up and running. It’ll help you add products for sale (although you won’t need this for a dropshipping business), and set up your payment options.
How Much Does Squarespace Cost?
Before you can publish your site and start selling properly, you’ll need to pick one of Squarespace’s trio of ecommerce plans:
- Business – $23 per month
- Basic Commerce – $27 per month
- Advanced Commerce – $49 per month
Although it might be tempting to go for the cheapest option, we’d recommend springing for at least the ‘Basic Commerce’ package if you’re serious about making your dropshipping website a success.
This is because the Business plan has limited ecommerce functionality, and is better suited to people who want to make a few sales on the side. The ‘Basic Commerce’ and ‘Advanced Commerce’ plans offer much more for the price you pay.
Further reading:
- If you’re looking for a more in-depth walkthrough of how to create a stunning Squarespace website, take a look at our step-by-step guide on How to Use Squarespace. Here, you’ll learn how each and every part of the editor works, and we’ve even thrown in some handy hints and tricks along the way!
- Want to make sure that Squarespace is the right builder for your dropshipping store? Check out our full Squarespace Ecommerce Review.
- Read our Squarespace Pricing Review if you’re interested in diving deeper into what Squarespace has to offer in exchange for your hard-earned cash.

#4. Choose a Dropshipping Method
- How to set up and use Printful
- How to set up and use Spocket
Once you’ve tinkered with your website design, and are happy with your customizations, it’s time to get to the best part: choosing your dropshipping app and browsing suppliers for products.
Your chosen app is going to be central to your dropshipping store’s success. It’ll determine which suppliers you use, the quality of your products, and the shipping times. With that said, it’s crucial to review all your options carefully before making your choice.
Below, we’re going to take a closer look at Printful and Spocket, two of the most popular Squarespace dropshipping apps. For a quick comparison between the two, check out our table below:
| Printful | Spocket |
|---|---|
| •Offers a free plan •Allows visitors to buy custom designs through your website to be printed onto products •Easier to use | •Offers a wider range of products to choose from •Easier to scale your business in the long term •More expensive |
No matter which app you decide to use, integrating either Printful or Spocket with Squarespace is fairly straightforward. Below, we’ll take you through the process for each. We’ll also give you some guidance on how to add products to your store and set your pricing rules, and we’ll provide a rundown of the costs for each app.
Printful
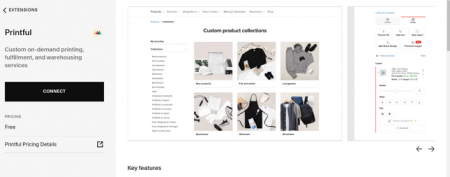
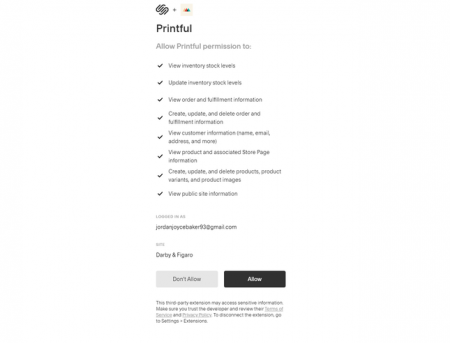
You’ll then need to give permission for Squarespace to share certain information with Printful, such as your stock levels and customer information. You can do this by clicking ‘Allow’ at the bottom of the page.
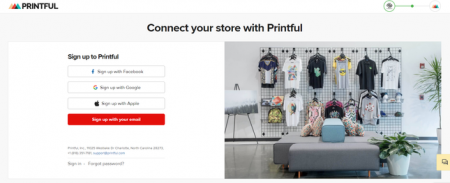
Once complete, you’ll then be invited to create an account with Printful. You can do this through Facebook, Google, Apple, or an alternative email. Next, just answer a few questions about what you want to use Printful for, confirm the connection, and you’re all set!
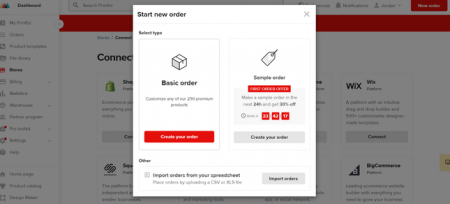
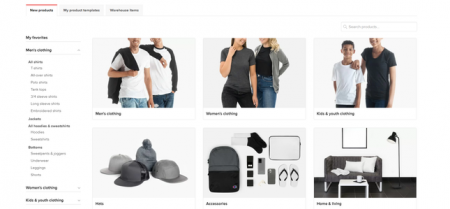
You’ll then be redirected to a product catalog page. There’s a wide selection of items to choose from, including clothing for men, women, and children, as well as hats, accessories, and homeware.
When you’ve selected your product, it’s time for the fun part – customizing it! Printful is ideal for sellers who want their products to stand out from the crowd, as it allows you to upload your own custom designs and print them onto the available products.
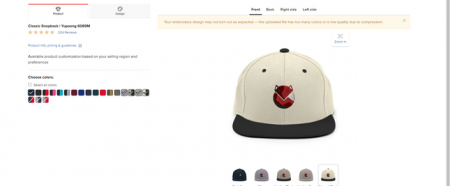
On the customization page, you can select different color variations, as well as resize and adjust the appearance of your designs once they’re on the product. Don’t worry – Printful will let you know if you go outside of the printing guidelines, so you never run the risk of having your images cut off.
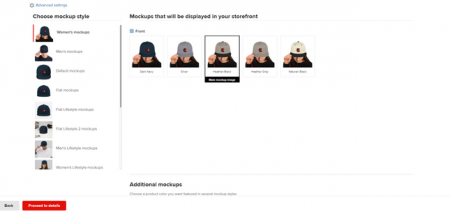
Once you’re happy with your designs, you can move onto the mock-up stage. This is where you can choose which images will appear on your site for each item. If you’ve chosen more than one color or style of product, you can choose different pictures for each one by accessing the ‘Advanced Settings’ in the top left corner. After this, you can alter the product description and title.
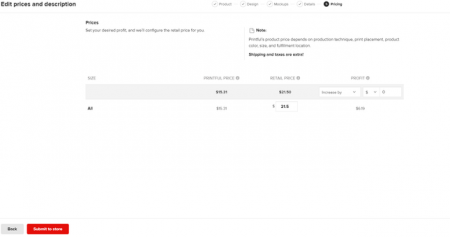
On this page, you can see the product’s wholesale price, and choose your retail price by editing the ‘Profit’ section. Printful will automatically provide you with a preset markup, but you can adjust it as you see fit.
The benefit of setting pricing rules is that they keep your profits consistent, even if the price of the product changes. Without them, you’d need to manually change the retail price of every single item, which is time-consuming and pretty inconvenient. This way, you don’t need to worry about missing a pricing change and losing out on money.
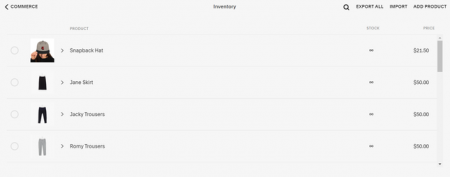
When you’re happy with your pricing rules, select ‘Submit to Store.’ This will cause your Printful account to sync with your website, and next time you go into your Squarespace inventory, you’ll be able to see your newly designed item!
The only thing you’ll ever have to pay Printful for is manufacturing and shipping costs, once your orders start to come through. The manufacturing costs are included in the wholesale price that you’ll see when you select your product, but shipping costs vary depending on where you’re sending an item.
Spocket
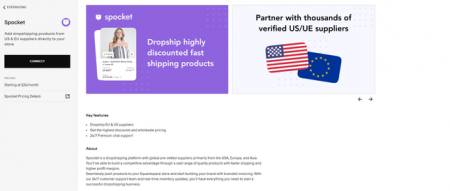
Once you’ve given permission for Squarespace and Spocket to share information, you’ll need to create a Spocket account. This involves entering your name, email address, and a password. After completing this, you’ll be taken to the Spocket dashboard.

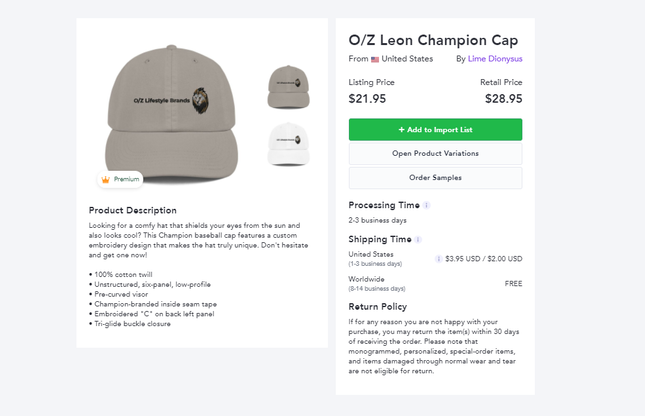
Each product comes with a full-page listing when you click on it. Here, you can view the item photos and description, the wholesale and retail prices, and the predicted shipping time.
You’ll also have the option to view the different product variations, and even order samples. We recommend doing this when you can, so that you can be sure the products you’re planning on selling are high quality.
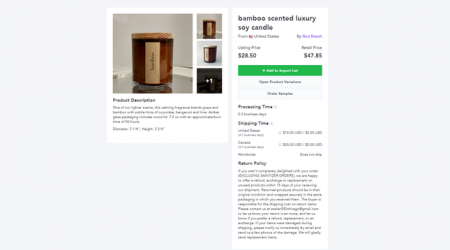
When you’re happy that the item ticks all of your boxes, click on the green ‘Add to Import List’ button.
Your Import List is where you make any final changes to your products before syncing them up with your website. It’s accessible from the left toolbar, and allows you to change the product name, description, and photos. From here, you can also use the ‘Variations’ tab to select the different versions of the product you’d like to sell in your store.
There are two ways to transfer your import list over to your Squarespace website. Firstly, you can do it product by product, selecting each specific item in your list and then clicking the ‘Push to Store’ button. Alternatively, you can select all of your products in one go, and use the ‘Push Current Page’ option at the top of the Import List to sync everything together.
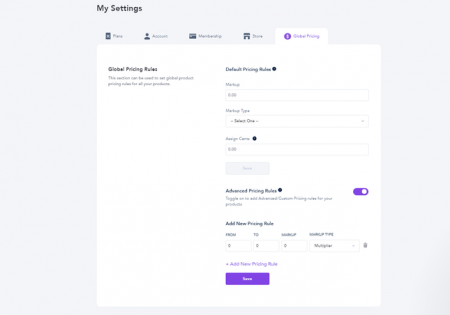
Once you’ve decided on the rules you’d like to set, press ‘Save’ to apply them to your items. Bear in mind, though – if you want to change your pricing rules at any time in the future, the new rules won’t apply to products already in your store. You’ll need to re-add them for the new guidelines to take effect.
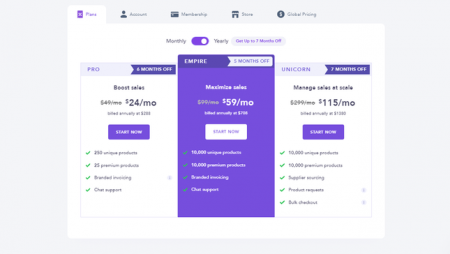
If you choose to pay for your subscription annually, you’ll be able to take advantage of its discounted rates. However, we’d only recommend doing this if you’re serious about growing your dropshipping store. If you’re just starting out, we’d advise you to start with Printful, because you won’t lose a ton of money if you end up deciding that the dropshipping game isn’t for you.
#5. Set Your Shipping Rules
- How to set your Squarespace shipping rules
With dropshipping, you don’t have to worry about packaging and posting your orders – your suppliers will take care of that for you. It’s one of the reasons so many people turn to dropshipping to start their ecommerce website.
However, that doesn’t mean you don’t have to take some responsibility for the shipping of your goods – there are still a couple of tasks that are down to you to sort out.
This is because shipping costs money, and that’s one thing your supplier won’t be able to take care of. It’s up to you to pay for this, but don’t worry – there are a couple of ways to do it:
- Charge your customers shipping on top of the cost of the product.
- Offer free shipping, but charge slightly more for the product, so the additional cost is covered by the higher price.
Whichever option you go for, make sure you check your dropshipping app for the correct shipping fees. You’ll be able to find these on the product listing, so you’ll know how much you need to charge your customers.
#6. Complete the Legal Paperwork
- Figuring out what legal boxes you need to tick
- Choosing a business structure
- Applying for an EIN
- Registering your business
Dropshipping might be one of the most convenient ecommerce models out there, but at the end of the day, it’s still a business. And, as with all businesses, there are certain official tasks you’ll need to tick off to make sure that everything is legal and above board.
Although this isn’t anything to worry about, it’s not always easy to know exactly what you need to do, because the requirements vary from state to state.
This means that you’ll need to check your local guidelines to make sure you’ve got everything covered. If you’re unsure about this, we recommend getting in touch with your authorities to be on the safe side. They’re usually very happy to help out!
Choose a Business Structure
Generally speaking, choosing a business structure is something you’ll need to do regardless of where you live. It helps to place your business into a specific category, so that it’s easier to tell which section of the legal system it answers to. There are three main categories to choose from:
- Sole Proprietorship
The business is registered under your name, so you’re completely responsible for everything, including debts and legal fees. Although this has its benefits in terms of taxes and paperwork, it has no liability protection, meaning you’ll have to foot the bill if anything goes wrong.
- Limited Liability Company
This structure offers a degree of separation between your business and your personal life, so you’re not fully liable in the case of an emergency. Your legal responsibilities only extend as far as how much money you invested in the business in the first place.
- Corporation
Most large-scale businesses sit under this category. It’s the most expensive of the three, but it offers the most liability protection because its owners are considered completely separate from the business as a whole.
Applying for an EIN
Regardless of their size or number of employees, all businesses in the US must have an Employer Identification Number (EIN). Also known as a Federal Tax ID Number, this identifier allows you to pay your taxes, as well as keep your personal and business finances separate.
Most dropshipping suppliers also require you to have one – so if you ever want to work with a third-party supplier outside of Spocket or Printful, your EIN will be one of the first requirements they ask for.
The application process for an EIN is relatively straightforward, and all the necessary information can be found on the IRS website.
Register Your Business
Finally, it’s time to register your business. This marks it as belonging to you, and it stops others from stealing your name and good ideas. We recommend doing this before you set your website live and start selling – just to be on the safe side!
The registration process depends on where you live, and what type of business structure you choose. It can be a little confusing, so take a look at this guide to registering your business to avoid missing any important steps.
How to Dropship on Squarespace: Summary
Congratulations! You’ve made it to the end of our guide, and are now ready to start your dropshipping journey with Squarespace. Let’s quickly recap all of the steps you need to cover to get your dropshipping store up and running:
- Pick Your Niche
- Plan Your Budget
- Create Your Squarespace Website
- Choose a Dropshipping App
- Set Your Shipping Rules
- Complete the Legal Paperwork
Dropshipping is one of the best ways of breaking into the ecommerce sphere, and we can’t wait for you to take this exciting step. Make sure to leave us a message in the comments section to let us know how you get on!
FAQs
However, if you’re looking to run a larger dropshipping store, we’d recommend using Shopify. Not only does it have greater ecommerce functionality, but it also offers more dropshipping apps to choose from.
You can then opt to use a free dropshipping app, such as Printful, or a paid one like Spocket – if you choose the latter, you’ll have to factor in at least $24 per month to benefit from its services.
However, dropshipping is still one of the cheapest ecommerce models out there. This is because you won’t need to pay for storage space, shipping, or manufacturing, so it’s perfect if you don’t have a ton of money to invest in starting your business.
2 comments