Omnisend – Shopify: A Step by Step Guide
Our independent research projects and impartial reviews are funded in part by affiliate commissions, at no extra cost to our readers. Learn more
Looking for an easy way to automate your email campaigns, but not sure where to look? Omnisend Shopify integration is just a step away, and it could take your website to new heights by helping you to understand your customers better, create compelling marketing campaigns, and keep track of your business’ performance every step of the way.
Read on to learn more about how to use Omnisend with Shopify, and what it can bring to your online store.
What Is Omnisend?
Omnisend is an easy-to-use marketing platform that helps you save time and increase your sales with a host of pre-built tools. Make use of email templates, pre-built automation workflows, segment suggestions, and form templates to integrate your email marketing strategy into one platform.
As you get the foundations of your marketing strategy set up, you can use Omnisend to find new ways to optimize and grow your business. Use Customer Intelligence Tools to personalize your messages, try new marketing channels to sell your product(s), and even A/B test your messages to find the right tone that will resonate with your audience.
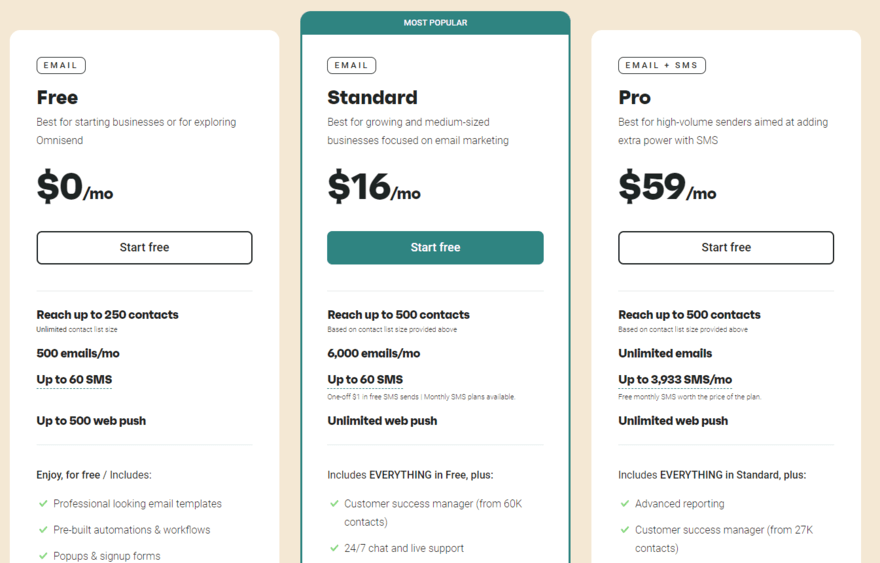
The Omnisend app has a free plan that lets you send up to 500 emails per month and send to up to 250 contacts. It also has two premium plans ranging from $16 to $59 per month. The premium plans up your contact and email limits – you can reach up to 500 contacts and send an unlimited number of emails on the most expensive plan.
Key Features of Omnisend
1. Automation:
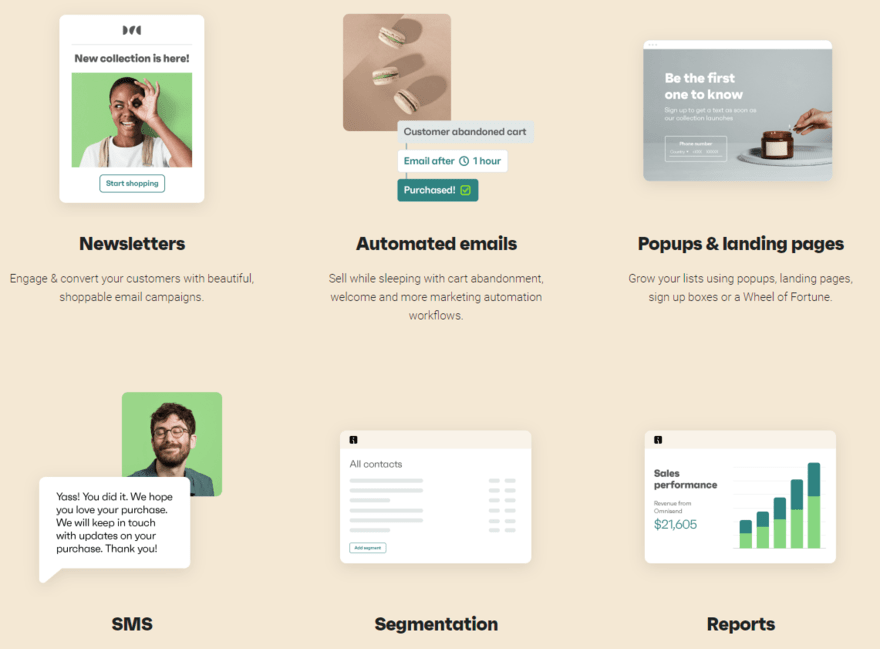
Make sure visitors to your website never miss a beat with Omnisend’s automation feature.
Send an email to customers who leave your website to remind them of products still waiting in their shopping cart, congratulate them for signing up to your online store, and even surprise your customers by sending them an email with a promo code to wish them happy birthday.
You can also use the automation feature to send customers their order confirmation, order-follow up (such as leaving a review), and push notifications on similar products. You can then track responses to emails and monitor traffic on your website to keep track of trends.
2. Campaign Management:
Omnisend’s campaign management feature helps you test your email subject lines with ease, so you can optimize your campaign’s performance by getting real feedback from customers.
This simple way to A/B test different subject lines on different customers can help you see which leads to the highest email open rate – so you can know which subject lines will resonate with your customers the most.
You can also make use of the campaign booster, which will promote your campaign by sending a reminder email 48 hours after the first, with a different subject line to incentivize customers. According to Omnisend, using the campaign booster can increase your sales by up to 30%.
3. Content Editor:
The Content Editor gives you the power to create, edit, and personalize all types of features to engage with your customers. Create unique email templates that you can use in your campaigns.
Either start from scratch, or edit any of the four ready-made templates provided. You can also use the Content Editor to make discount coupons to entice customers to make a purchase in your online store.
The “gift box” feature is a great way of giving back to your customers, rewarding their loyalty and increasing engagement with your customer base. There’s even a “scratch card” feature which your customers have to “scratch” to reveal the discount code!
4. Forms:
Forms is a versatile feature of Omnisend, and a great way of engaging with your customers and gaining more subscribers to your mailing list.
You can drive conversions on your website by creating bright, eye-catching pop-ups that grab your visitors’ attention and encourage them to sign up to your website. Then create consistent campaigns using the same styles and changing the text or discount offering.
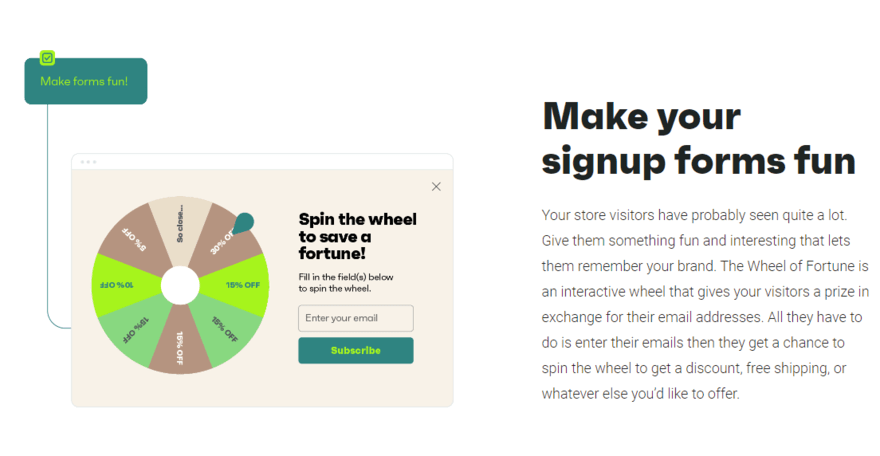
Use the Forms feature to create the sign up form on your website – you can even use a “wheel of fortune” feature to encourage them to sign up. Every time visitors play, they have a chance of receiving a discount code.
5. Reports:
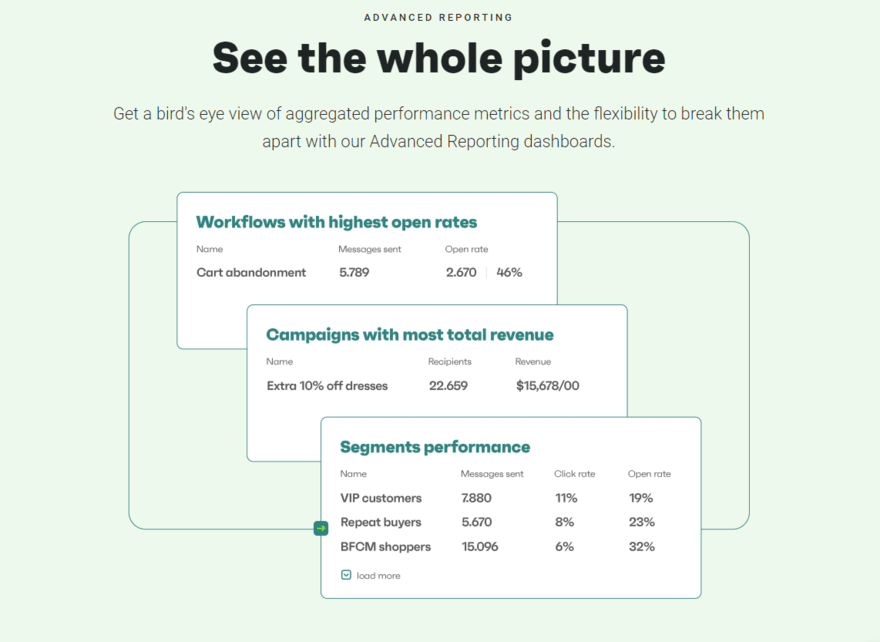
This is where you can track and monitor the performance of your website, all in one integrated place. Here you can see how many people have visited your website in total, how many are currently using it, and how many have left.
You can also see how your automated email campaign is performing by tracking click, open, and unsubscribe rates – so you can track your campaigns as they happen.
The forms reports dashboard will show you how your sign up flow is going – i.e. how many people have signed up and where they are from. Click on any time period to understand how your web shop is performing in real time. For example, you can compare month-by-month, or week-by-week.
6. Subscriber Management:
The Subscriber Management feature allows you to choose which of your segmented mailing lists you want to send each campaign to. Create segmented mailing lists with the segmentation tool, then target your campaigns to the right people so that your email campaigns are as effective as possible.
For example, segmented mailing lists can be made on the basis of subscribers’ shopping behavior, based on those who have placed orders from you, or have opened your email campaigns.
There is also a custom audience feature which syncs with Facebook and Instagram to automatically move your social media subscribers into segmented mailing lists. You can use this feature to target your ads on Facebook and Instagram to bring more traffic to your website.
Pros and Cons of Omnisend With Shopify
| Pros | Cons |
|---|---|
| User-friendly content creator | Email templates can be “cookie cutter” |
| Insightful reports on campaigns and website | Not enough varieties of email templates |
| Automated email campaign management | Real-time reporting slower than expected |
| Large amount of email templates | Free plan only allows you to reach up to 250 contacts |
| Easy mailing list segmentation and personalization |
Find out more
Want more details on Shopify too, before getting started? Our full Shopify Review runs through Shopify’s pros and cons in detail.
How to Set Up Omnisend for Shopify
#1. Login to Your Shopify Account
The first thing you need to do is log into your Shopify account. If you don’t have a Shopify account, click “create account” to make a new Shopify account.
Need a helping hand? Our step-by-step guide on how does Shopify work walks you through how to get started.
#2. Add and Install the Omnisend App
Click the Menu icon (the three horizontal lines) at the top of the screen, and select “Apps.” You’ll be taken to a page that lists all the apps you can link to Shopify.
Scroll down the list until you find “Omnisend Email Marketing & SMS.” Then, click the “Add App” button beneath where it says Omnisend.
The website will show the Omnisend Shopify Integration terms. Read through the terms, then click on “Install App” at the bottom of the page.
Congratulations! You’ve now completed your Omnisend Shopify Integration.
Find out more
Now you know how easy it is to install apps, you might not want to stop with Omnisend! Check out our list of the best Shopify apps to install this year for more options.
Summary
Great job! You should now know how to use Omnisend with Shopify to create wonderful, automated email campaigns, beautifully designed email templates, and a fully integrated marketing campaign that you can monitor and track to keep on top of your web shop’s performance.
The features available with Omnisend for Shopify may seem overwhelming at first, but give it a go and you’ll soon see how easy it is. Once you’ve set up your Omnisend Shopify Integration and created a few email campaigns, all you need to do is sit back and watch as the traffic on your website flows and new subscribers start signing up!
FAQs
Simply select how many subscribers you have, and Omnisend will show you the pricing plans most relevant to you.
2 comments